




 GPro 100W
 GA 100W
 GM Pro 60W
 Reno 65W
 Reno 65W Pro
 Reno 45W

A Practical Guide to Laser Rock Engraving and How to Engrave Stones Like a Pro
8%
off
Hurry! Offer Ends Soon!
CODE: AUBLOG888
COPY
CODE
CODE
If you’ve ever picked up a smooth river rock and thought, “this would look unreal with a design on it,” you’re not alone. Learning how to engrave stones has become a pretty popular hobby and even a side hustle across Australia. With modern machines, laser rock engraving is no longer just for industrial use, it’s something small shops and even home users can do with solid results.
This guide walks you through the real, practical side of how to engrave stones using a laser. No fluff, no overcomplicated talk, just what works and what doesn’t. If you want clean, professional-looking results with laser rock engraving, you’re in the right place.
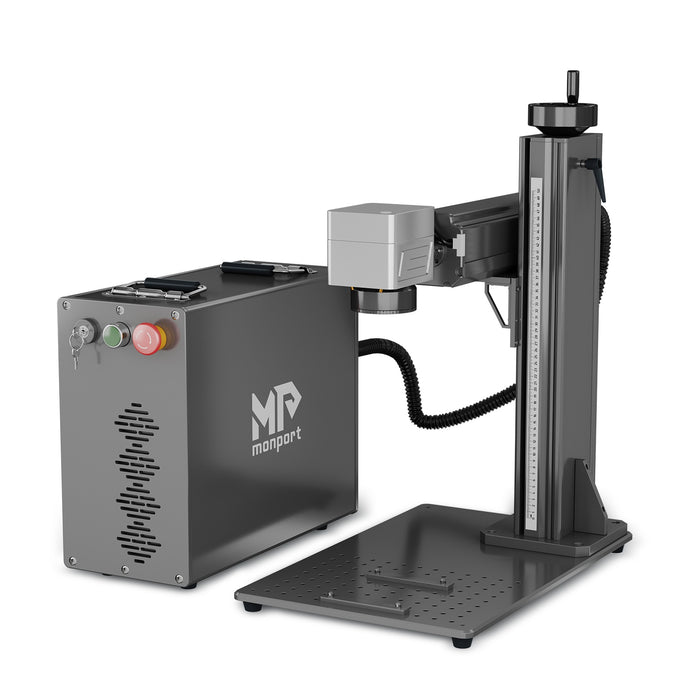
Monport GPro 60W Split MOPA Fiber Laser Engraver & Marking Machine With Manual Focus

Understanding Laser Rock Engraving Basics
Before jumping into settings and machines, you need to get a feel for what laser rock engraving actually does. A laser doesn’t “carve” like a chisel. It uses heat to alter the surface of the stone.
When learning how to engrave stones, remember that different rocks react differently:
-
Granite engraves clean and high contrast
-
Slate gives sharp detail
-
Marble can be tricky but looks premium
-
River stones vary a lot
That’s why mastering laser rock engraving is partly about testing materials, not just machine settings.
Choosing the Right Stone for Engraving

Not all stones are worth your time. If you’re serious about how to engrave stones, start with predictable materials.
Best options for beginners:
-
Granite tiles
-
Black slate
-
Polished river rocks
Avoid stones with too many cracks or uneven surfaces. They mess up laser rock engraving and lead to inconsistent results.
If you’re selling products, consistency matters. Clean finishes are what make laser rock engraving look professional, not rushed.
Machine Setup and Workspace Tips
Your workspace doesn’t need to be fancy, but it does need to be stable. Vibration affects detail, especially when doing laser rock engraving on small pieces.
Basic setup tips:
-
Keep your table level
-
Use proper ventilation
-
Secure the stone in place
-
Always test before final engraving
Getting this right makes learning how to engrave stones way easier and saves you from wasting materials.
Why Monport Machines Stand Out
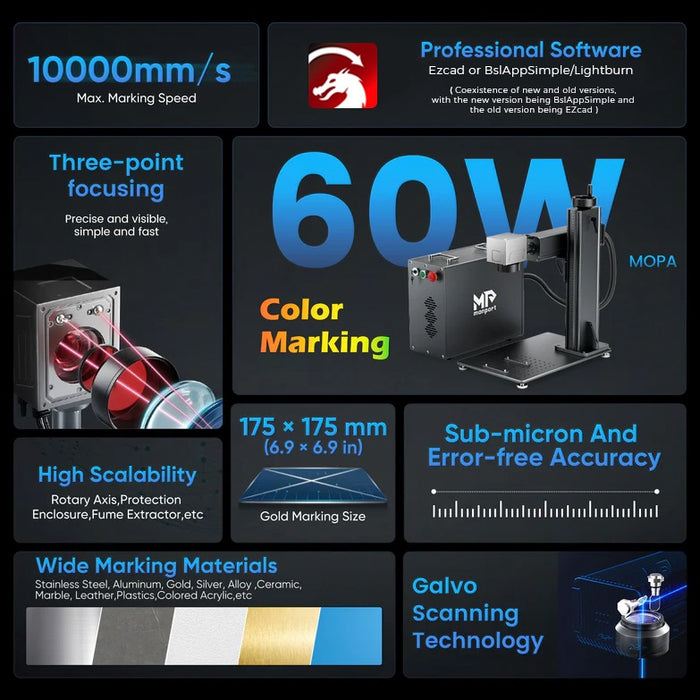
If you want reliable results, machine choice matters more than people think. The Monport GPro 60W is a solid option for both beginners and serious users.
Power and Precision
With 60W laser power and marking speeds up to 10,000mm/s (even pushing 15,000mm/s), this machine handles laser rock engraving with ease. It gives you strong, consistent results when learning how to engrave stones without needing constant adjustments.
Flexible Marking Capabilities
The adjustable frequency and pulse width let you control depth and texture. That’s a big deal in laser rock engraving, especially when switching between slate and granite.
High-End Galvanometer
The Sino-Galvo RC1001 system keeps movements sharp and accurate. When doing detailed work, this level of precision helps a lot in mastering how to engrave stones.
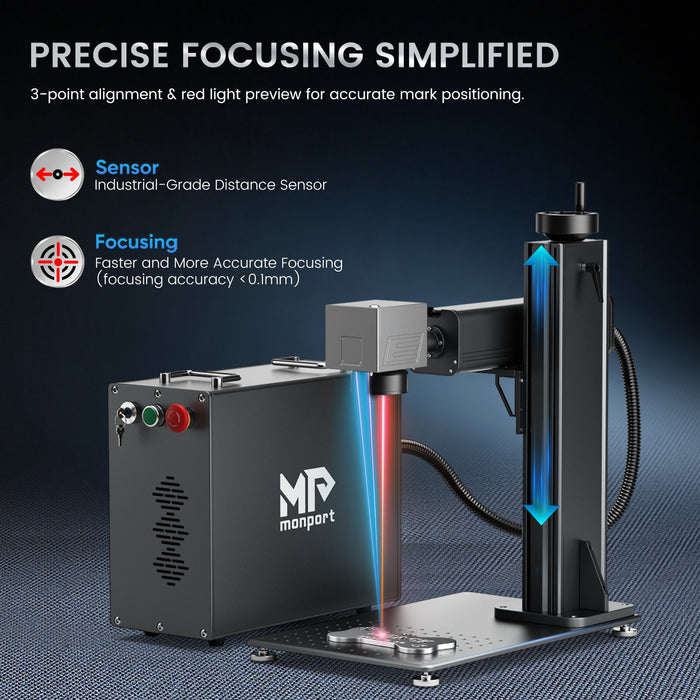
Easy Focusing System
Three-point red light alignment makes setup quick. You can preview your design before engraving, which is honestly a lifesaver when doing laser rock engraving on uneven stones.
Safety and Software
Emergency stop, access key, and compatibility with EZcad and BslAppSimple give you flexibility and peace of mind. That matters whether you’re just learning how to engrave stones or running a small business.
Step-by-Step Process for Engraving Stones
Here’s the practical part. This is where most people mess up when starting with laser rock engraving.
Step 1 Prepare the Stone

Clean the surface. Dirt or oil affects results. A simple wipe-down goes a long way when learning how to engrave stones.
Step 2 Set the Focus

Proper focus is everything. Even a slight error can ruin your laser rock engraving outcome.
Step 3 Adjust Settings

Start with moderate power and speed:
-
Medium power
-
Slower speed for deeper engraving
-
Test passes first
Fine-tuning is key to mastering how to engrave stones.
Step 4 Run a Test

Never skip this. Testing helps you avoid wasting time and materials during laser rock engraving.
Step 5 Engrave the Final Design

Once satisfied, run your final job. Stay nearby in case adjustments are needed.
Want to speed up your progress? Discover More about reliable machines and start creating cleaner results today using code AUBLOG888.
Design Tips That Actually Work
Good design makes a huge difference in laser rock engraving.
Keep these in mind:
-
Use high-contrast images
-
Avoid overly fine details on rough stones
-
Stick with bold fonts
When learning how to engrave stones, simpler designs usually look better, especially early on.
Common Mistakes to Avoid
Everyone makes mistakes starting out with laser rock engraving, but you can skip a few if you know them ahead.
-
Using the wrong stone type
-
Skipping test runs
-
Incorrect focus height
-
Overpowering the laser
Avoiding these speeds up your learning curve in how to engrave stones.
Maintenance and Longevity Tips
A well-maintained machine gives consistent results. That’s critical for laser rock engraving.
Basic upkeep:
-
Clean lenses regularly
-
Check alignment
-
Keep software updated
If you’re serious about how to engrave stones, maintenance isn’t optional, it’s part of the process.
Key Takeaways
-
Laser rock engraving is about precision, not force
-
Start with reliable stones like slate or granite
-
Machine quality directly affects your results
-
Testing is essential when learning how to engrave stones
-
Consistency comes from setup, not luck
Conclusion
Getting good at how to engrave stones takes a bit of trial and error, but once you dial things in, the results can be seriously impressive. Whether you’re doing it for fun or turning it into a business, laser rock engraving gives you the tools to create something lasting and unique.
With the right machine, proper setup, and a bit of patience, you can move from basic attempts to clean, professional results faster than you might expect. Keep testing, keep refining, and don’t rush the process.
Ready to level up your engraving game? Shop Now and unlock exclusive savings with code AUBLOG888.
FAQs
What is the best stone for beginners in laser engraving
Granite and slate are the easiest when learning how to engrave stones because they give consistent results.
Can all lasers engrave rocks
Not really. You need enough power and control for proper laser rock engraving, especially for harder stones.
How deep can laser engraving go on stone
It depends on the settings and material, but most laser rock engraving is surface-level with visible contrast.
Do I need special software
Most machines work with EZcad or similar programs. These help control designs when learning how to engrave stones.
Is laser engraving on stone permanent
Yes, laser rock engraving is long-lasting and doesn’t fade easily, making it ideal for keepsakes and products.


Leave a comment