

 GA 60W
 GA 100W
 GQ 30W
 GPro 100W
 GM Pro 30W
 GM Pro 60W
 Reno 65W
 Reno 65W Pro
 Reno 65W Pro Vision
 Reno 45W Pro Vision

Smart Ways to Master Software Laser Engraver for Precision Engraving on Metal That Actually Sells
8%
off
Hurry! Offer Ends Soon!
CODE: AUBLOG888
COPY
CODE
CODE
Getting clean, sharp results from a software laser engraver isn’t just about hitting “start” and hoping for the best. If you’re serious about engraving on metal that actually sells, you need to understand both the machine and the software side of things. A lot of beginners miss this part, and that’s why their results look flat or inconsistent. This guide breaks it down in a simple, practical way, no fluff, just what works in real jobs.
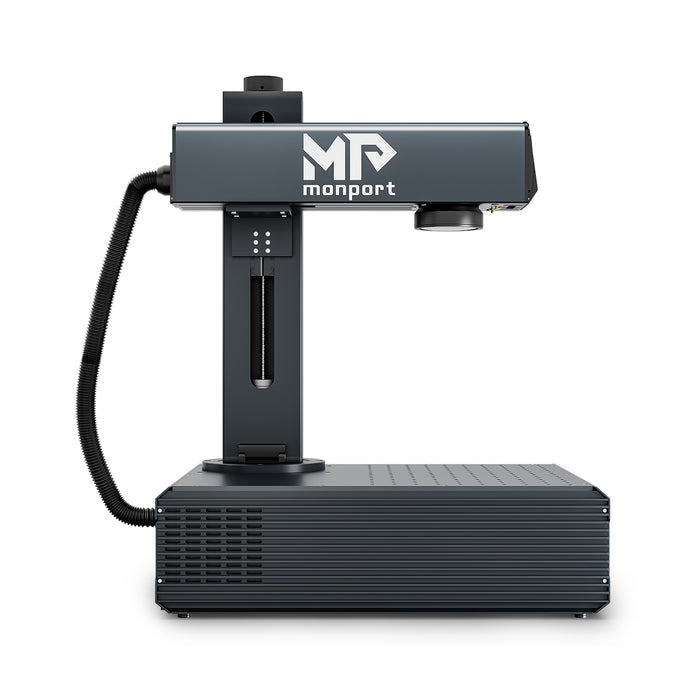
Monport GA 100W : Upgraded Integrated MOPA Fiber Laser Engraver & Marking Machine with Auto Focus

Why Software Control Matters More Than You Think
When people talk about a software laser engraver, they usually think it’s just a control panel. But really, it’s where the quality happens. Every detail in engraving on metal depends on your settings like speed, power, frequency, and passes.
If your output looks weak or burnt, it’s often not the machine, it’s your settings.
Here’s what software lets you control:
-
Power percentage for depth and contrast
-
Speed for precision and burn control
-
Frequency for colour and texture on metals
-
Hatch spacing for fill quality
Dialing these in properly turns average engraving on metal into something customers will actually pay for.
Choosing the Right Machine for Precision Work
Not all machines are built equal, especially when you want consistent engraving on metal. One standout option right now is the Monport GA 100W MOPA fibre system.
Why Monport GA 100W Works So Well
The Monport GA 100W is designed for serious software laser engraver users who want reliable output.
Key specs that matter:
-
100W laser power for deeper and faster engraving on metal
-
1064nm wavelength, ideal for metals
-
Marking speed up to 10000mm/s
-
Long lifespan up to 100,000 hours
Built for Real-World Jobs
What makes it different is the build and usability. The integrated aluminium body keeps everything stable, which helps your software laser engraver maintain consistent results even during long runs.
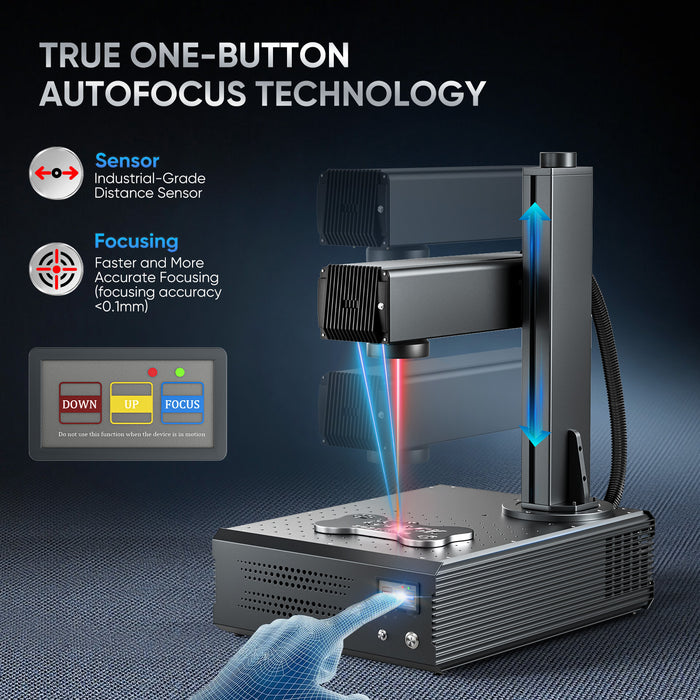
The auto-focus feature is a big win too. Instead of guessing, you get accurate focus in one click, which improves engraving on metal quality straight away.
Flexibility That Boosts Creativity
The ±90° rotating arm gives more freedom for awkward parts or unique product designs. This matters a lot if you’re selling custom pieces, because better positioning leads to cleaner engraving on metal.
Mastering Software Settings for Better Results
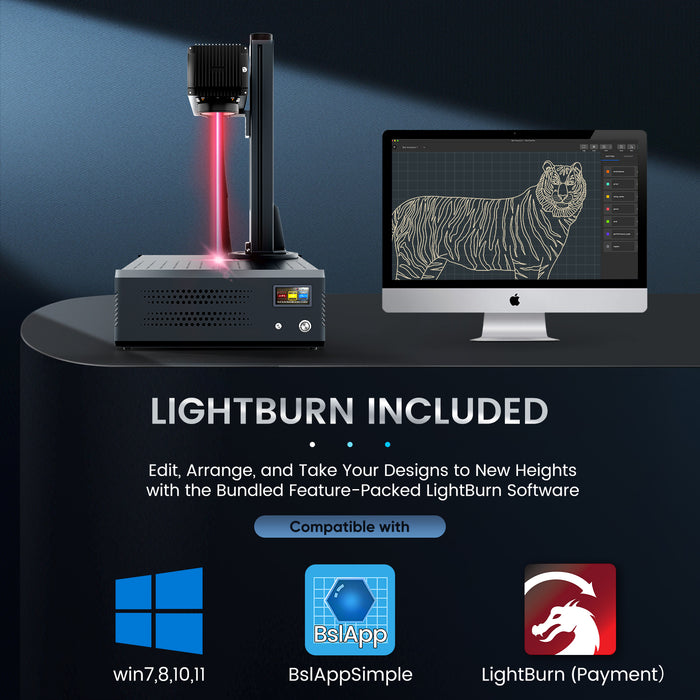
If you want your software laser engraver to produce sellable work, you need to get comfortable adjusting settings. There’s no one-size preset.
Speed vs Power Balance
Too much power burns the surface. Too little leaves faint marks.
Start like this:
-
High speed + moderate power for light marking
-
Lower speed + higher power for deep engraving
-
Test small batches before full runs
Every metal reacts differently, so testing is key for consistent engraving on metal.
Frequency and Pulse Width Tricks
With MOPA systems like the Monport GA, you can adjust frequency and pulse width. This is where things get interesting.
-
Low frequency = deeper engraving
-
High frequency = smoother finishes
-
Pulse width changes colour tones on some metals
This level of control is what separates a basic software laser engraver user from someone making premium products.
Design Tips That Actually Sell

Even with perfect machine settings, bad design won’t sell. Your engraving on metal needs to look clean and readable.
Keep Designs Simple but Sharp
Avoid overcomplicated graphics. Fine lines can blur if not set properly in your software laser engraver.
Best approach:
-
Use bold fonts
-
Increase contrast
-
Avoid tiny details unless tested
Use Proper File Preparation
Before sending to your software laser engraver, make sure:
-
Vector files are clean
-
No overlapping paths
-
Correct scaling
This avoids wasted materials and improves engraving on metal output.
If you’re looking to upgrade your setup or want a machine that makes this process easier, now’s a good time to check options. Better tools plus the right software laser engraver skills means better profit from your engraving on metal work.
Workflow That Saves Time and Money
Efficiency matters if you’re selling products.
A smart workflow with your software laser engraver should look like this:
-
Test settings on scrap metal
-
Save presets for each material
-
Batch similar jobs together
-
Clean surface before engraving
This reduces errors and keeps your engraving on metal consistent across orders.
Common Mistakes to Avoid
Even experienced users slip up sometimes. Watch out for these:
-
Skipping test runs
-
Using default settings blindly
-
Ignoring focus accuracy
-
Poor surface preparation
Fixing these instantly improves your software laser engraver results and makes your engraving on metal look more professional.
Key Takeaways
-
A software laser engraver is where precision really happens
-
Settings like speed, power, and frequency control quality
-
Machines like Monport GA 100W give better consistency
-
Clean design and prep improve engraving on metal results
-
Testing and saving presets saves time and materials
FAQs
What is the best setting for engraving on metal?
There’s no single best setting. Each software laser engraver setup depends on the metal type, but starting with medium power and adjusting based on test results works well.
Why does my engraving look burnt?
Too much power or slow speed can cause burning. Adjust your software laser engraver settings and test again on scrap material.
Can beginners use a fibre laser engraver?
Yes, especially models with auto-focus like Monport. A beginner-friendly software laser engraver setup makes engraving on metal easier to learn.
How do I get deeper engraving?
Lower speed and increase power gradually. Also check focus accuracy on your software laser engraver.
Is MOPA better for metal engraving?
Yes, MOPA systems allow more control over frequency and pulse width, improving engraving on metal quality and finish options.
Conclusion
Mastering a software laser engraver isn’t complicated, but it does take practice and attention to detail. Once you understand how each setting affects engraving on metal, you’ll start producing cleaner, sharper, and more sellable work. Machines like the Monport GA 100W make things easier with features like auto-focus and stable build, but the real difference comes from how you use the software. Keep testing, keep adjusting, and your results will keep improving.
If you’re ready to level up your setup, shop now or discover more tools that can help you get better results faster. Don’t forget to use the code below when you’re ready.
Blog Code: AUBLOG888

Leave a comment